Solder stations normally come with a sponge and/or brass “brillo” pad. The purpose is to remove excess flux and solder from the tip. If too much flux builds up and burns onto the soldering tip, it will eventually dewet and be unusable (but not necessarily unrecoverable). Unless the tip cleaning tools are used properly, they can do more harm than good. When choosing a sponge, make sure it is made of natural cellulose (like Plato replacement sponges). Synthetic sponges will melt onto the soldering tip and can shorten tip life. Use clean DI water. Tap water may include minerals that can build-up on the tip. When you saturate the sponge, wring it out so it is not dripping wet. Too much water can increase the thermal stress of the tip, and slow down tip recovery.
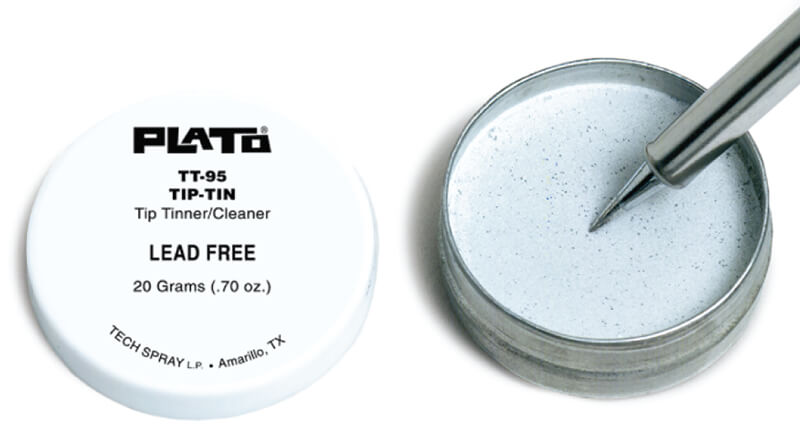
When the soldering tip has turned black from baked on fluxes and no longer wets properly, it is time for the cleaning tools of last resort. Tip tinner (Plato #TT-95) is a combination of lead-free solder and cleaner. While the soldering iron is at full temperature, roll it in the tip tinner. As you roll it, it should change from black to shiny silver as the baked flux is cleaned off. Then wipe off the excess tip tinner from the soldering tip, and retin using wire solder. Don’t let the name fool you – “tip tinner” is not intended to be left on the tip.
Polishing bars are also available and used to scrub the tip clean of flux residues. This should only be used as a last resort because you will be removing iron along with the burnt flux. Once a tip shows pitting, actual holes in the iron, it is time to be replaced.

Type of brass to clean soldering tips
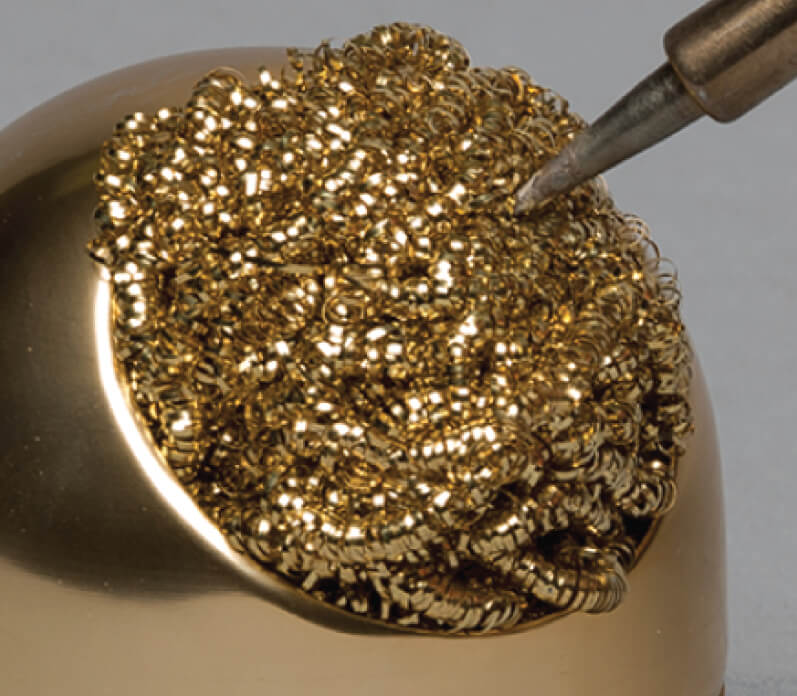
Brass Tip Cleaner
- Pro-Fast and easy to use, doesn’t require saturating with water, and doesn’t thermally shock the soldering tip.
- Con – It is abrasive, although brass is softer than the iron on the end of the tip. It has more of a tendency to scratch the chrome plating, which keeps the solder from wetting up the tip. That could allow corrosion to creep in under the plating, reducing the life of the tip.
Cellulose Sponge
- Pro – It is an effective and fast way to clean a tip. They come with different holes or slits to make it even faster and easier, and to avoid flinging molten solder.
- Con – Cools down the tip, so requires the tip to heat up again. It also can thermally shock the tip, especially if the sponge is overly saturated. This can shorten the tip life by creating micro-fractures in the iron plating.
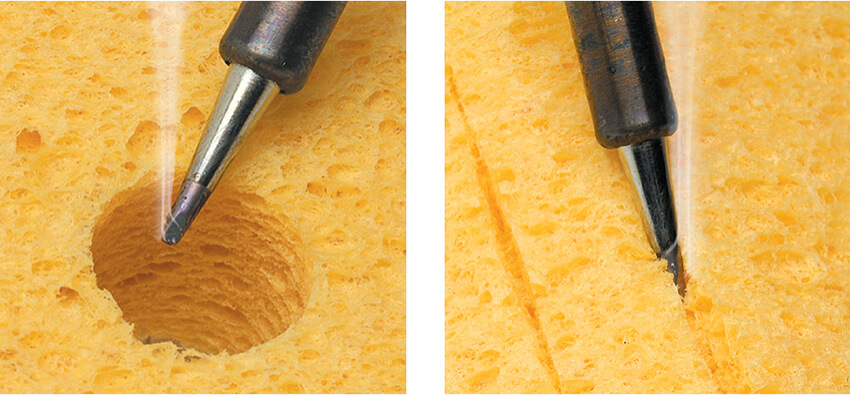
Make sure you are using a cellulose sponge that is intended for cleaning soldering tips. Cellulose is a natural material derived from wood pulp. It will not melt and damage the soldering tip as a synthetic sponge would. The sponge should not be soaking wet, just lightly damp. Wring it out thoroughly after saturating with Deionized (DI) water. DI water is recommended to prevent mineral build-up on the soldering tip. Once your soldering tip has been cleaned, remember to retin by melting on a small amount of solder on the end of the tip. This prevents the working end of the tip, which is iron, from corroding when exposed to air over a period of time.
When should I throw away an old soldering tip?
When the tip is black and dewetting (solder doesn’t cling to it), called a “cold tip”, it can generally be cleaned and used again. Once there is pitting and visible corrosion, it is time for a new tip. The outside of a soldering tip is plated with iron over the thermally conductive copper center. This protects the soft, corrosion-prone copper from the harsh fluxes. Once flux gets through the iron plating through pits, the tip will be eaten away quickly.
Should I clean all the solder off the soldering tip after I’m finished soldering?
It is a common practice to wipe down the soldering tip before putting it back into its holder. This exposes the raw iron on the working end of the tip, which will rust in the open air. Add any residual flux to the mix, and you have a prematurely pitted soldering tip. Before taking a break or stopping for the day, wipe off residual flux and solder, and retin by applying fresh solder to the end of the tip.
What can I do to increase soldering tip life?
Since the move from lead to lead-free solders, a common complaint has been short tip life. The higher heat needed for lead-free solders and flux with greater activity all leads to faster tip burn-out. Often the tips turn black, and the solder beads and just drips off the end of the tip. It may also be referred to as a “cold tip”, but take care not to touch it with your bare fingers.
Soldering tips have a copper core that transfers heat from the heating element to the working end (tip of the tip). Because copper is very soft and easily corroded and worn away, other metals are used to plate over the copper, including an outer layer of iron. Although iron is very hard, it will still corrode eventually. In addition, it can be coated with flux and other soils, which can cause dewetting. Corrosion and dewetting will slow down soldering and eventually necessitate scrapping the tip. Although all tips will have their day in the trash bin, there are several steps an operator can take to increase tip life:
- Turn down the heat
- Properly clean the tip
- Tin the soldering tip
- Use special cleaning tools
When leaving the solder station for anything over 5 minutes, turn off it off. When you leave the station turned on, the tip remains at soldering temperature, further reducing tip life. Modern soldering equipment heats up to a soldering temperature in seconds, so the time savings is not worth the reduction in tip life.
How can I avoid corrosion on the PCB after I’m finished soldering?
Flux residues can cause dendritic growth and corrosion on PCB assemblies, so make sure you’re using best practices and clean the board. After all, the components have been replaced and excess solder removed:- Clean the area thoroughly with a quality flux remover.
- Angle the board to allow the cleaner and residues to run off.
- If needed, use a horsehair brush or lint-free wipe to gently scrub the PCB, and then follow with a rinse.
- If using a wipe, make sure it doesn’t leave fibers/lint on your PCB, which may cause issues later.
This is an optional step for no-clean flux, but still a good idea for densely populated or high voltage boards. It is absolutely required, regardless of the flux type, if you plan to follow your repair with conformal coating.